There’s something almost magical about a perfectly roasted chicken. My grandmother—we called her Nana Morgan—taught me this recipe when I was just tall enough to peer over her kitchen counter. She’d wake early on Sundays, filling the house with aromas that promised comfort and connection. What I remember most wasn’t just the crispy, golden skin or the tender meat that fell from the bone, but how that humble bird brought everyone to the table with anticipation glowing in their eyes. The true secret? Time. Not just the cooking time, but the generations of hands that have perfected this method, transforming a simple chicken into something sacred.
🍗 The Perfect Grandmother-Style Roast Chicken
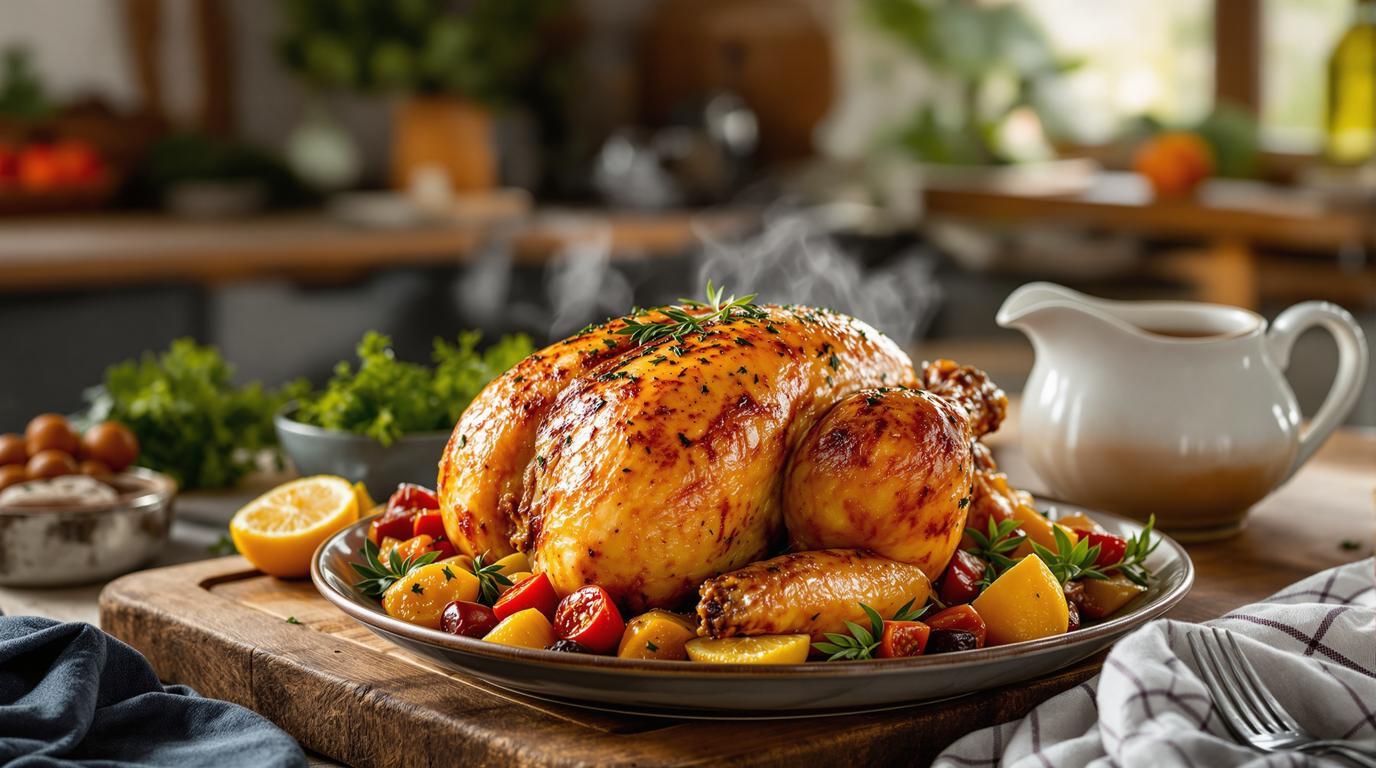
Traditional roast chicken sits at the crossroads of simplicity and sophistication. While it may seem straightforward, achieving that perfect balance of crispy skin and juicy meat requires understanding a few fundamental principles that grandmothers worldwide have known for generations.
What makes this recipe special is the two-temperature approach—starting hot to crisp the skin, then reducing to gently cook the meat. This technique dates back centuries, but remains the gold standard in kitchens from British countryside cottages to American farmhouses.
📋 Essential Ingredients
- 1 whole chicken (5 lbs/2.25 kg), brought to room temperature
- 2 oz (55g) unsalted butter, softened
- 2 tablespoons fresh herbs (equal parts thyme, rosemary, sage), finely chopped
- 1 unwaxed lemon, quartered
- 1 small onion, quartered
- 2 carrots, 2 celery stalks, 1 onion, roughly chopped for the vegetable bed
- ½ cup (125ml) white wine (or chicken stock)
- Sea salt and freshly ground black pepper
- 2 tablespoons all-purpose flour (for gravy)
- 2 cups (480ml) chicken stock (for gravy)
👨🍳 Step-by-Step Instructions
- Prepare the chicken: Preheat your oven to 425°F/220°C. Remove any giblets from the cavity and pat the chicken completely dry with paper towels—this is crucial for crispy skin.
- Create the herb butter: Mix the softened butter with chopped herbs, 1 teaspoon salt, and ½ teaspoon pepper until well combined. Using your fingers, gently separate the skin from the breast meat and massage about half the butter mixture directly under the skin. Rub the remaining butter all over the chicken’s exterior.
- Season and stuff: Season the cavity generously with salt and pepper, then insert the lemon quarters and onion pieces. If desired, truss the legs with kitchen twine for even cooking.
- Prepare the roasting pan: Create a natural rack by arranging the chopped vegetables in the bottom of a roasting pan. Place the chicken breast-side up on this vegetable bed. Pour the wine or stock into the pan (not over the chicken).
- Two-stage roasting: Roast at 425°F/220°C for 20 minutes to initiate browning. Reduce temperature to 375°F/190°C and continue roasting for approximately 1 hour and 15 minutes (calculate 20 minutes per pound). Baste occasionally with pan juices.
- Check for doneness: The chicken is done when a thermometer inserted into the thickest part of the thigh registers 165°F/74°C. Alternatively, pierce the thigh—juices should run clear without any pinkness.
- Rest: Transfer the chicken to a cutting board and tent loosely with foil. Rest for 15-20 minutes before carving. This crucial step allows juices to redistribute throughout the meat.
- Make the gravy: While the chicken rests, strain pan juices into a measuring cup and skim off most of the fat (reserve 2 tablespoons). In a saucepan over medium heat, whisk the reserved fat with flour for 1-2 minutes until bubbling. Gradually whisk in the pan juices and stock until smooth. Simmer until thickened, season to taste.
Chef’s Note: The vegetable bed isn’t just for elevation—as those vegetables caramelize beneath the chicken, they create complex flavors that transform your gravy from good to unforgettable. Don’t discard them; either purée into the gravy or serve alongside the chicken.
🔍 Techniques that Make the Difference
The most common mistake home cooks make is skipping the proper drying of the chicken. Those extra minutes with paper towels mean the difference between soggy and crispy skin. Another critical but overlooked step is allowing the chicken to come to room temperature before roasting—this ensures even cooking from surface to center.
For a variation on this classic, try this Southeast Asian-inspired preparation that uses similar protein-cooking principles with entirely different flavor profiles.
🍽️ Serving Suggestions
Carve your chicken at the table for maximum impact—there’s nothing quite like that moment when the knife glides through the crispy skin to reveal the succulent meat beneath. Serve with your homemade gravy, perhaps alongside these spiced lentils for a complete meal.
For a true comfort food experience, pair with mashed potatoes or Belgian-style fries. The crispy chicken skin’s textural contrast with creamy sides creates that perfect bite that’s driven Sunday family dinners for generations.
Save any leftover chicken for incredible sandwiches, or try it alongside these Belgian waffles for an unexpected but delightful twist on chicken and waffles.
And don’t forget dessert—nothing complements a traditional roast like these classic chocolate chip cookies, bringing your meal full circle with grandmother-approved comfort from start to finish.
Remember, roasting a chicken isn’t just cooking—it’s participating in one of humanity’s oldest culinary traditions. Each time I prepare this recipe, I feel my grandmother’s hands guiding mine, and I hope this tradition continues through your family’s hands as well. There’s poetry in transforming something humble into something magnificent—exactly what our grandmothers taught us cooking is all about.