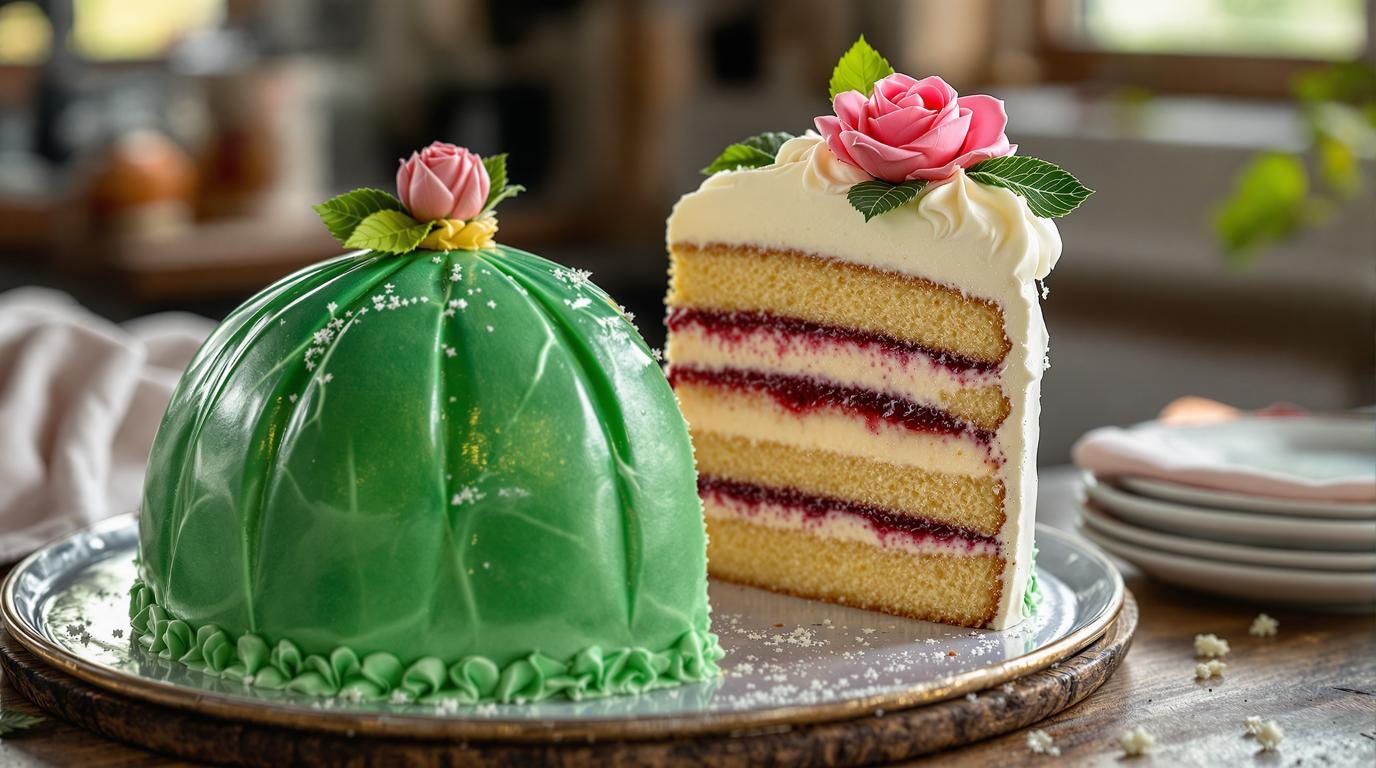
I still remember the first time I encountered a true Swedish Princess Cake. It was during my culinary tour of Scandinavia, where I discovered this emerald-domed treasure in a small Stockholm bakery. The owner, a third-generation baker, explained that each layer represented a different element of Swedish baking tradition, dating back to the 1930s when Jenny Åkerström first created it for the Swedish princesses. What makes this cake magical isn’t just its striking appearance, but the harmonious balance between light sponge, tangy jam, silky custard, and cloud-like cream—all beneath that signature marzipan blanket.
The Enchanting Layers of Prinsesstårta
The Princess Cake epitomizes Scandinavian elegance through simplicity. Each component must be perfect on its own, but it’s the assembly that transforms these elements into something truly regal. I’ve spent years refining this recipe to capture authentic Swedish flavors while making it accessible for home bakers.
What many don’t realize is that the traditional green marzipan symbolizes the early spring in Sweden—a hopeful color representing new beginnings. While modern variations sometimes use pink or white marzipan, the classic green remains most revered in Swedish bakeries.
Essential Ingredients
For the sponge layers (3 total):
• 3 large eggs, room temperature
• 1 cup (200g) superfine sugar
• 1 cup (120g) all-purpose flour
• 1 tsp baking soda
• ½ tsp salt
• ¼ cup (60g) unsalted butter, melted
• 1 tsp vanilla extract
For the fillings:
• ½ cup high-quality raspberry jam
• 2 cups whole milk
• ½ cup heavy cream
• ¼ cup granulated sugar
• 2 tbsp cornstarch
• 3 large egg yolks
• ½ tsp vanilla extract
• 2 cups heavy whipping cream
• 2 tbsp granulated sugar
• 1 tsp unflavored gelatin (my grandmother’s secret for stability)
For the marzipan dome:
• 1.5 cups almond paste or store-bought marzipan
• Green food coloring (gel preferred)
• Powdered sugar for dusting
Creating the Perfect Prinsesstårta
1. Prepare the sponge: The foundation of a great Princess Cake is an airy, delicate sponge. Preheat your oven to 350°F (175°C). Beat room temperature eggs and sugar for a full 5 minutes until tripled in volume and pale yellow. This extended beating creates the structure that replaces leavening agents in traditional Swedish genoise.
2. The gentle fold: Sift your dry ingredients directly over the egg mixture and fold with a wide spatula using a figure-eight motion. When I was an apprentice, my mentor would slap my hand if I stirred rather than folded—stirring deflates those precious air bubbles! Add the melted butter last, incorporating just until combined.
3. Bake and cool: Pour into an 8-inch round pan and bake 25-30 minutes until a toothpick comes out clean. Cool completely before slicing horizontally into three even layers. If you’re nervous about slicing evenly (I still am after 20 years!), refrigerate the cake for 30 minutes first—it firms up and becomes easier to handle.
Chef’s Note: For truly authentic flavor, add a tablespoon of cardamom to your sponge batter. This subtle addition is common in Swedish baking but often omitted in international recipes. It’s the difference between a good cake and a transporting experience.
4. Custard mastery: Heat milk, cream, and half the sugar until steaming. Meanwhile, whisk egg yolks with remaining sugar and cornstarch. The key technique: temper your eggs by slowly adding a third of the hot milk while whisking constantly. Return everything to the pot and cook until thickened, stirring constantly with a wooden spoon. You’ll know it’s done when it coats the back of the spoon and a finger drawn through leaves a clear path.
5. Stabilized whipped cream: Dissolve gelatin in 2 tablespoons of water, let bloom for 5 minutes, then microwave for 10 seconds until liquid. Whip cream with sugar until soft peaks form, then slowly drizzle in the gelatin while whipping to medium-firm peaks. This stabilization technique is vital—it prevents the dome from collapsing during serving, something I learned from my grandmother’s kitchen wisdom.
6. Architectural assembly: Place your first cake layer on a serving plate. Spread with raspberry jam, then half the custard. Add second layer, remaining custard, then mound most of the whipped cream into a dome shape. Place the final cake layer on top, pressing gently to secure—this creates the cake’s distinctive domed profile.
7. Marzipan magic: Knead food coloring into marzipan until achieving that signature jade green. Roll between parchment papers into a circle large enough to drape over the entire cake. Lift carefully and cover the cake, smoothing gently from the top down to avoid air bubbles—much like I teach in my pistachio layered dessert technique.
Serving the Crown Jewel
Chill your Princess Cake for at least 2 hours before serving. The cool temperature firms the layers, making it easier to achieve clean slices—similar to how proper temperature control transforms ordinary eggs into extraordinary dishes. Use a sharp knife dipped in hot water between cuts for bakery-worthy slices.
Serve alongside coffee brewed the Swedish way—strong and unadorned—to balance the cake’s sweetness. The contrast between the bright marzipan, creamy interior, and that punchy coffee creates a sensory experience that explains why this cake has remained beloved for nearly a century.
Like regional breakfast traditions or family potato recipes, mastering this classic Swedish dessert connects you to generations of bakers who’ve created moments of joy through thoughtful pastry work. When you cut into your first homemade Prinsesstårta and reveal those perfect, distinct layers, you’ll understand why I believe some recipes are worth every minute of careful attention they require.